
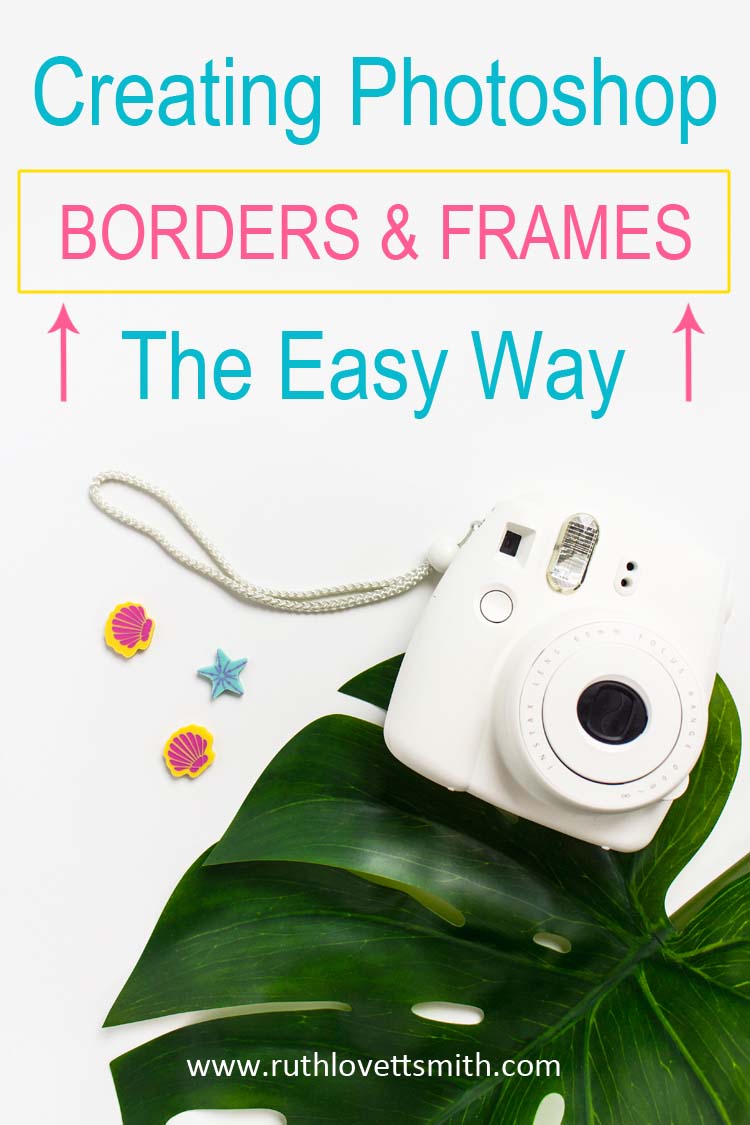
Creating Photoshop Borders & Frames the Easy Way
This post may contain affiliate links. For more information, see my full disclosures here.
There are numerous Photoshop borders and frames tutorials on the Internet. Some of them are more involved than others. However, creating Photoshop borders and frames doesn’t have to be complicated.
Following are my tips for creating Photoshop borders and frames the easy way.
What are Photoshop Borders and Frames
Photoshop borders and frames are exactly what you think they are; image borders and frames that you create in Photoshop. In other words, outlined boxes and rectangles.
They can be thin or wide, and any color you choose.
Where to Use Photoshop Borders and Frames
You can use Photoshop borders and frames anywhere your heart desires.
You might want to put a solid border around an image. Or you might want to create an outlined rectangular box to put text in.
Borders and frames are also great for creating pins for Pinterest.
How to Create Photoshop Borders and Frames
As I mentioned above, creating borders and frames in Photoshop is super easy.
- Open an existing Photoshop file that you want your frame in. (Or create a new file.)
- Create a new layer for your frame.
- Choose the color that you want your frame to be.
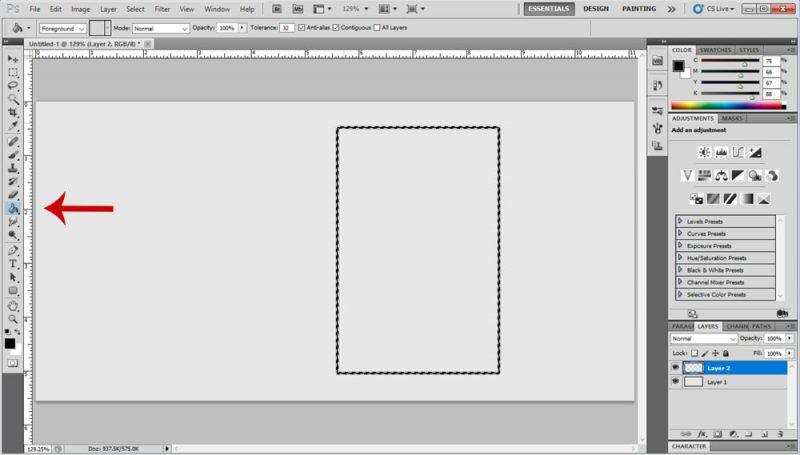
- Select the “Rectangular Marquee Tool”.
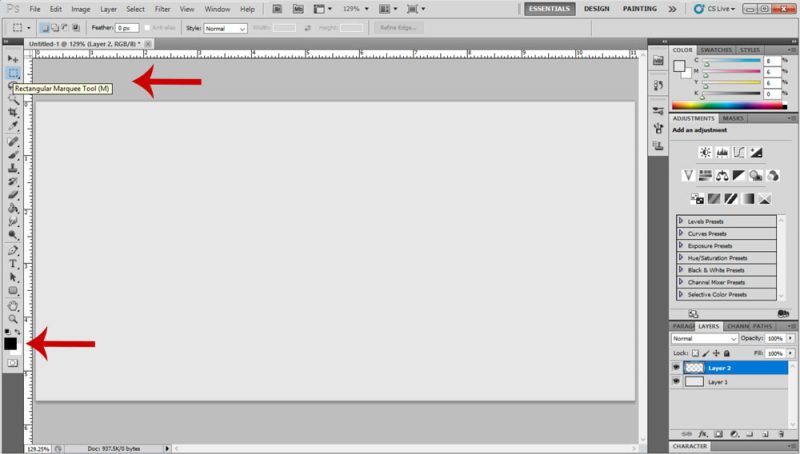
- Use the “Rectangular Marquee Tool” to create the size and shape of the frame that you want.
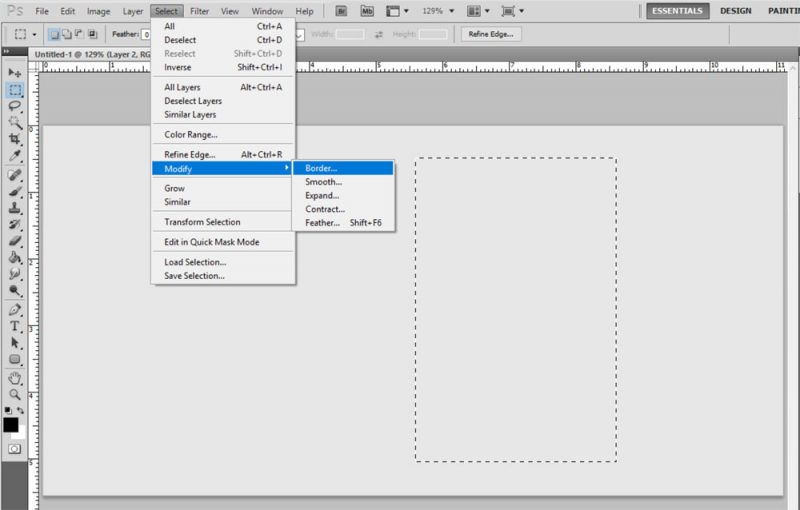
- Then go to Select > Modify > Border.
- Click on “Border”.
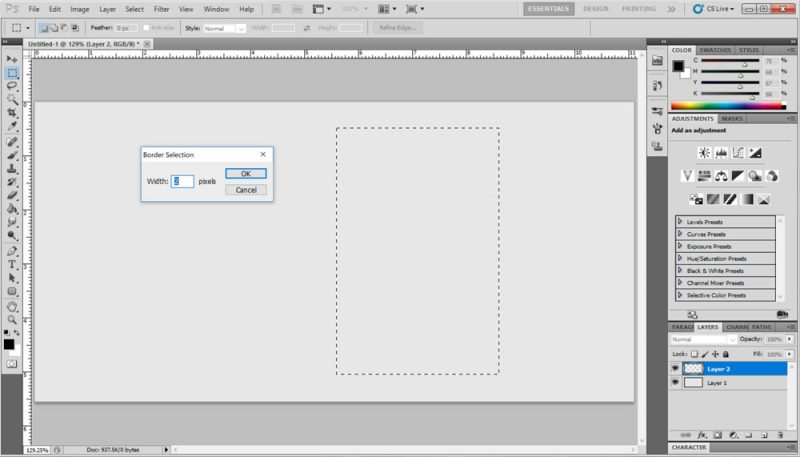
- A “Border Selection” box will pop up.
- Here you can indicate the width of your border in pixels.
- Click “OK”.
- Your dotted outline will now turn into a clear dotted outline frame.
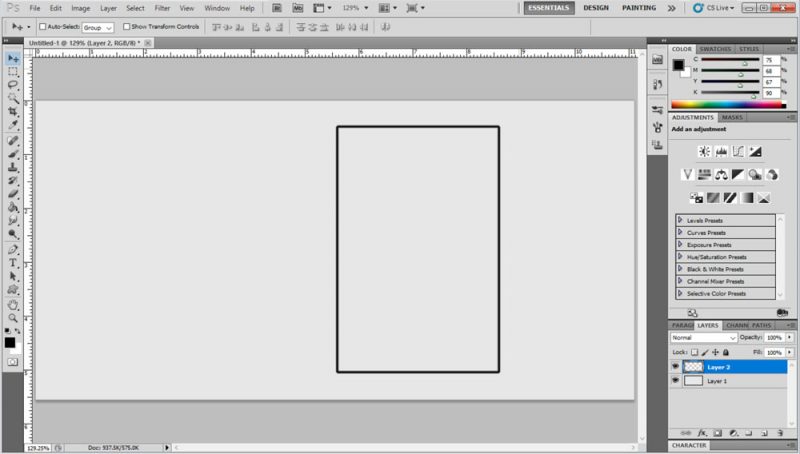
- Choose the “Paint Bucket Tool” and fill the clear frame.
That is it. Now you have a rectangular frame.
Now that you know the steps involved, you can create borders and frames around images, quotes, and more.

Very Nice blog you have good knowledge.
Thank you for shareing it.
Thanks Anand, I sincerely appreciate it!
Hey Ruth,
This is some helpful tutorial.
Photoshop is one of the most powerful photo editing software we have out there. But it’s quite heavy in terms of resource usage. It’s not easy to manipulate as well. That’s why I appreciate you taking time to educate your readers on how to use it for common image effects.
I hope you are set for a wonderful weekend ahead.
Thanks Enstine! Photoshop can definitely be overwhelming. For non Photoshop users, Canva can be a great program for producing blog images and pins. Hope you had a great weekend!